Asters are beloved for their vibrant blooms and ability to attract pollinators, making them an ideal choice for container gardening. With their stunning array of colors and varieties, aster plants can transform any patio, balcony, or garden space into a lively retreat. If you want to learn how to successfully grow asters in pots, this guide will provide all the necessary steps, along with some easy hacks that make the process simpler and more effective.
Understanding Asters
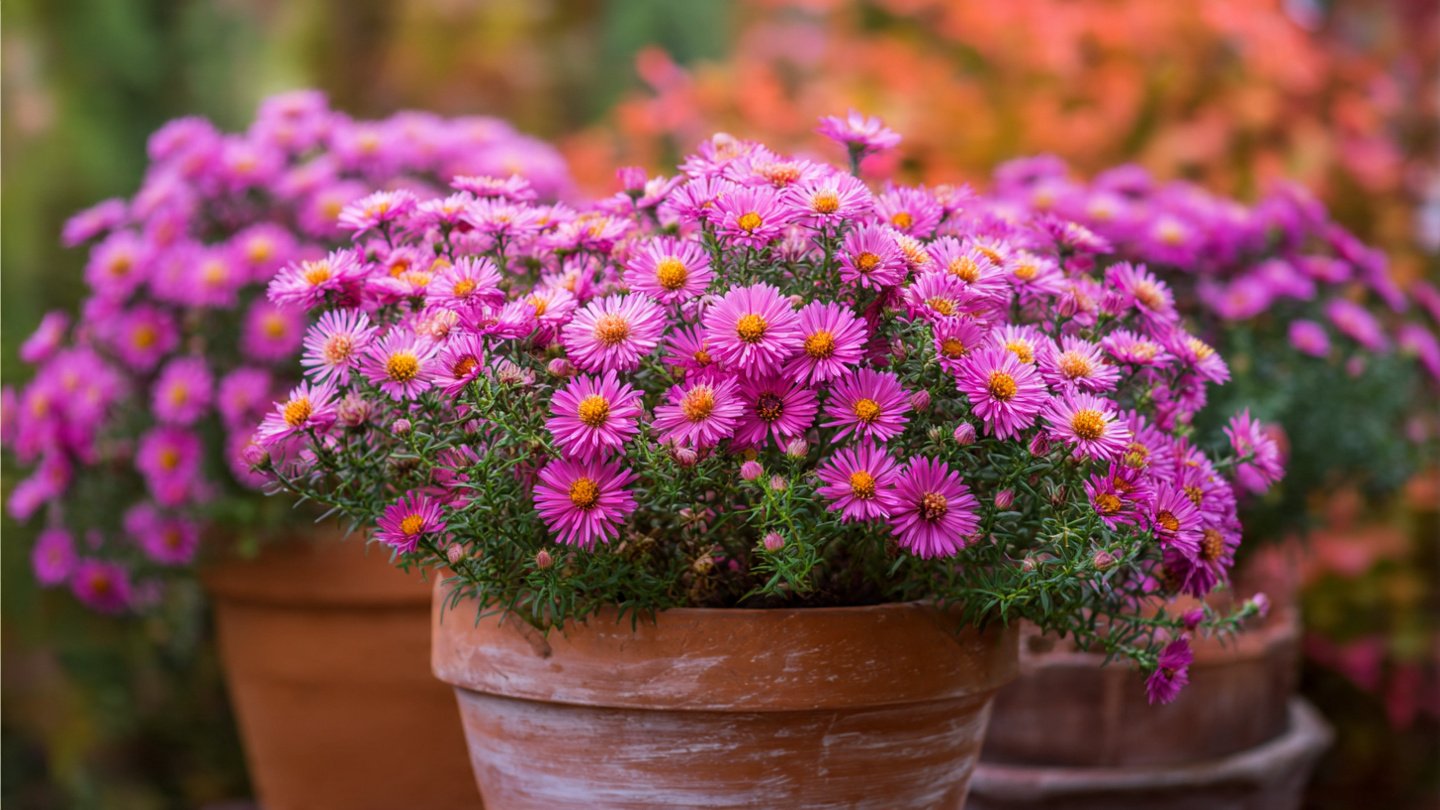
Asters are perennial flowering plants that typically bloom in late summer to fall, with some varieties even blooming into early winter. They belong to the Asteraceae family and come in various shapes, sizes, and colors, including pink, purple, blue, and white. Their attractive flowers not only beautify your space but also provide food for bees and butterflies.
Why Choose Asters for Container Gardening?
- Space Efficiency: Asters thrive well in pots, making them suitable for those with limited garden space.
- Versatility: They can complement various garden styles, from formal to cottage gardens.
- Long Blooming Season: With proper care, asters can provide flowers for months, enhancing summer and fall displays.
Choosing the Right Container
Selecting the appropriate pot is crucial for the success of your aster plants. Here are some tips for choosing the right container:
- Size: Pick a pot that is at least 12-14 inches wide and deep to accommodate the root system. Aster plants can grow tall, so ensure your pot has enough depth.
- Material: Terracotta, ceramic, and plastic pots work well. However, terracotta is preferred for its breathability, which helps prevent root rot.
- Drainage: Ensure the pot has adequate drainage holes at the bottom to allow excess water to escape. This is vital for preventing waterlogged soil, which can lead to root rot.
Soil Requirements
Asters require quality potting soil that offers good drainage and fertility. Here’s how to create the perfect soil mix:
- Base Mixture: Use a high-quality potting mix as the base. You can find special mixes designed for flowering plants.
- Amend with Perlite: To improve drainage, mix in perlite or vermiculite, which enhances aeration and prevents compaction.
- Organic Matter: Add compost or well-rotted manure. This will provide essential nutrients and improve soil structure.
Planting Asters
Once you’ve got your pot and soil ready, it’s time to plant your asters.
Step-by-Step Planting Process
- Prepare the Pot: Fill the container with your potting mix, leaving about 1-2 inches of space at the top.
- Water Before Planting: Lightly water the potting mix to ensure it is moist but not soggy.
- Position the Plant: Remove the aster from its nursery pot and gently loosen any tightly bound roots. Place it in the center of your container.
- Fill in Gaps: Fill around the root ball with more potting mix, gently pressing down to eliminate any air pockets.
- Water Again: After planting, thoroughly water the container to settle the soil and ensure the plant is securely in place.
Location and Light Requirements
Asters generally prefer full sun to partial shade. Here’s how to select the best location for your pots:
- Sunlight Needs: Aim for at least 6 hours of sunlight daily. Morning sun is ideal, as it helps dry off the dew, reducing the risk of fungal diseases.
- Wind Protection: Choose a sheltered spot to prevent strong winds from damaging the delicate blooms and causing pots to topple.
Watering and Fertilization
Proper watering and fertilization will significantly impact the health and blooming capability of your asters.
Watering Tips
- Frequency: Water your asters when the top inch of soil feels dry to the touch. During hot and dry spells, they may require more frequent watering.
- Method: Water deeply but less frequently to encourage deep root growth. Avoid overhead watering, as wet foliage can lead to diseases.
Fertilization Strategy
Though asters are not heavy feeders, they benefit from occasional fertilization:
- Initial Application: Use a balanced, slow-release fertilizer when planting, following the package instructions.
- Monthly Boost: During the growing season, a monthly application of liquid fertilizer can help boost blooms. Consider using a fertilizer high in phosphorus to support flower development.
Pest and Disease Management
Pest and disease issues can occasionally arise when growing asters in pots. Here’s what to watch for and how to manage these challenges:
Common Pests
- Aphids: These small, sap-sucking insects can weaken your plant. Spray with insecticidal soap or neem oil to control them.
- Spider Mites: Often appearing in dry conditions, they can be combated with regular watering and insecticidal soap.
Disease Prevention
- Powdery Mildew: A common fungal disease in asters, it can be prevented by ensuring good air circulation and not overcrowding your pots.
- Root Rot: Ensure pots have good drainage and do not overwater to prevent this serious condition.
Deadheading and Maintenance
Regular maintenance will keep your asters looking their best throughout the blooming season.
Deadheading For More Blooms
- Technique: As flowers fade, remove them to encourage the plant to produce more blooms. Cut back the wilted flowers just above the next leaf node.
- Timing: Deadheading should be done weekly during peak blooming to maximize the floral display.
Seasonal Care
- End of Season Care: After the first frost, cut back the plants to about 6 inches above the soil. This will help keep them dormant during winter but can remain in the pot outdoors if protected.
Seasonal Considerations
Depending on your climate, here are some seasonal tips:
- Spring: As temperatures warm, check for any signs of growth and remove any dead plant material.
- Summer: Ensure consistent watering as summer heat can quickly dry out pot soil.
- Fall: As temperatures begin to fall, be ready to cover pots when frost is expected.
- Winter: If you live in a colder climate, consider moving pots to a protected location, or use frost cloths to shield them during harsh weather conditions.
Conclusion
Growing asters in pots can bring vibrant colors and joy to any garden, balcony, or patio. With the right container, soil, care, and maintenance techniques, you can create a stunning floral display that thrives throughout the season. Whether you are a seasoned gardener or just starting, these easy hacks for growing asters in pots will help you enjoy the beauty of these charming flowers.
FAQs
1. How long do asters bloom?
Asters typically bloom from late summer to early fall, lasting several weeks. Some varieties may continue to bloom into early winter under the right conditions.
2. Can asters be grown indoors?
While asters prefer outdoor conditions, you can grow them indoors as long as they receive enough light. A south-facing window or grow lights can help provide the necessary sunlight.
3. How do I propagate asters?
Asters can be propagated through division in spring or early fall. Carefully separate the roots and replant them in new containers with fresh soil.
4. What should I do if my asters are not blooming?
If your asters aren’t blooming, check their light exposure, water, and nutrient levels. Insufficient sunlight or nutrient deficiency could hinder blooming.
5. Are asters deer-resistant?
Generally, asters are not favored by deer due to their coarse texture and fragrant foliage, but extreme conditions may lead deer to munch on them.
6. When is the best time to plant asters in pots?
The best time to plant asters is in spring after the last frost has passed, or in early fall for a fall display, depending on your region.
By exploring these tips and insights, you may cultivate a stunning container garden filled with lovely asters, enhancing your outdoor living space and attracting beneficial pollinators. Happy gardening!