Easy Hack to Grow Ginger Indoors and Enjoy Fresh Harvest All Year Round
Introduction
Ginger, a popular spice known for its culinary and medicinal properties, is not only a staple in kitchens across the globe but also an incredibly versatile plant that you can grow indoors. With its unique flavor profile and numerous health benefits, having fresh ginger at your fingertips can elevate your cooking and overall wellness. This article delves into an easy hack to grow ginger indoors, ensuring a year-round harvest, along with tips, care instructions, and answers to frequently asked questions.
Why Grow Ginger Indoors?
The primary reasons for growing ginger indoors include:
-
Accessibility: Fresh ginger is readily available without needing to make regular trips to the grocery store.
-
Cost-Effective: Growing your own ginger can save money, especially in regions where fresh ginger is expensive.
-
Freshness and Flavor: Homegrown ginger offers superior flavor compared to store-bought varieties.
-
Health Benefits: Ginger is known for its anti-inflammatory and antioxidant properties, promoting overall health.
-
Space Efficiency: Growing ginger in pots allows you to utilize limited space effectively.
Selecting the Right Ginger Root
To begin your indoor ginger-growing journey, the first step is to select suitable ginger root. Here’s what to consider:
1. Organic Roots
Choose organic ginger roots from your local market or grocery store. Organic roots are often free from chemicals and pesticides, which can help in healthy plant growth.
2. Fresh Roots
Look for plump and fresh ginger roots. Avoid shriveled or dried-out pieces, as these may not sprout effectively.
3. Eyes (Nubs)
Choose pieces that have visible “eyes” or nubs, which are growth buds. The more eyes there are, the more shoots will develop.
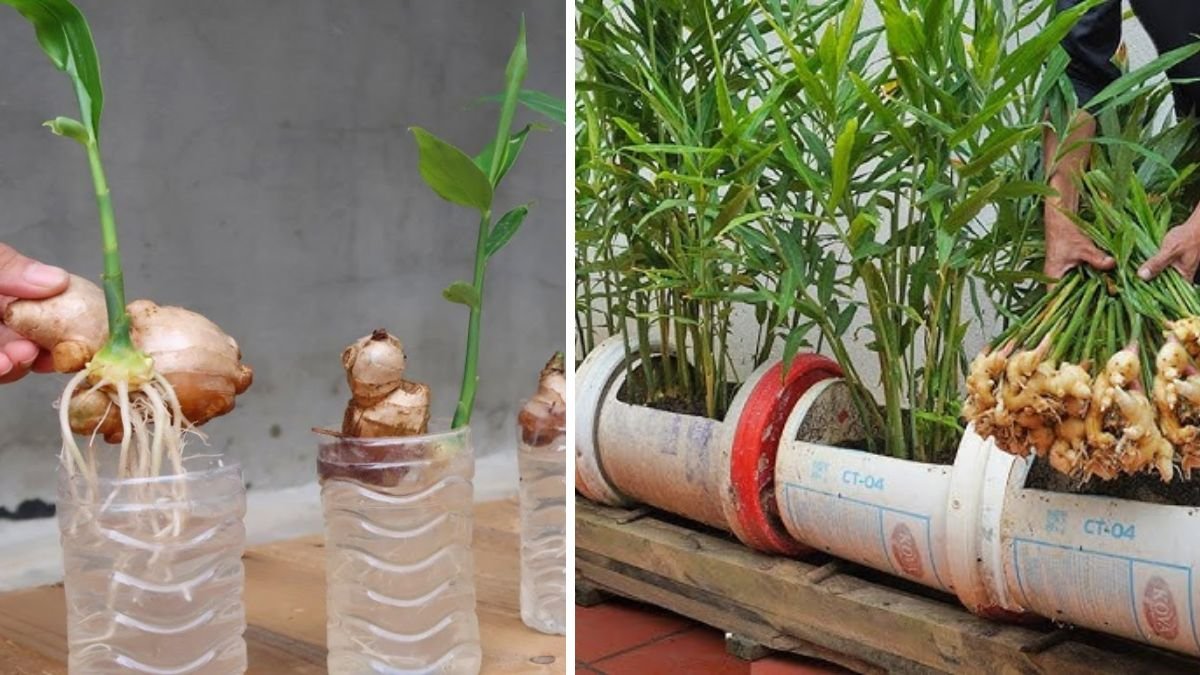
The Easy Hack for Growing Ginger Indoors
The following step-by-step guide makes it easy for you to grow ginger indoors without complex gardening techniques.
Step 1: Preparing the Ginger Root
-
Soaking: Before planting, soak the ginger root in water overnight. This process rehydrates the root and encourages sprouting.
-
Cutting (Optional): If the root is large, consider cutting it into smaller sections, ensuring each piece has at least one eye. Allow the cuts to dry for a few hours to prevent rot.
Step 2: Choosing the Right Pot
-
Size: Select a pot that is at least 12 inches in diameter and 12 inches deep. Ginger roots grow horizontally, so a wide pot is ideal.
-
Drainage: Ensure the pot has drainage holes to prevent waterlogging, which can lead to root rot.
-
Material: Using clay or ceramic pots can help regulate moisture better than plastic pots.
Step 3: Preparing the Soil
-
Soil Mix: Create a well-draining soil mix. A blend of potting soil, compost, and sand is ideal. This mixture provides the necessary nutrients while allowing excess water to drain.
-
pH Level: Ginger prefers a slightly acidic to neutral soil pH of around 6.0 to 6.8.
Step 4: Planting the Ginger
-
Planting Depth: Place the ginger piece horizontally in the soil with the eye (bud) facing up. Cover it with about 2 inches of soil.
-
Watering: Water the soil thoroughly after planting. Ensure the soil remains moist but not soggy.
Step 5: Providing the Right Conditions
-
Light: Ginger thrives in indirect sunlight. Place your pot in a spot where it can receive bright, filtered light, like near a window with sheer curtains.
-
Temperature: Ginger prefers temperatures between 70°F to 85°F (21°C to 29°C). Keep it away from cold drafts and heating vents.
-
Humidity: Ginger loves humidity. If your home is dry, consider using a humidifier or placing a tray of water near the plant to increase moisture.
Step 6: Watering and Maintenance
-
Watering Schedule: Water the ginger regularly, keeping the soil consistently moist. Reduce watering during the winter months when the plant is dormant.
-
Fertilization: Apply a balanced liquid fertilizer every four to six weeks during the growing season (spring and summer) to encourage healthy growth.
-
Weeding: Remove any weeds that may compete for nutrients, especially in the early stages of growth.
Harvesting Ginger
Ginger typically takes 8-10 months to mature. Here’s how to determine the right time to harvest:
-
Young Ginger: If you prefer young ginger, you can start harvesting as early as 4 months after planting. Gently pull the roots without damaging the plant to enjoy tender, flavorful ginger.
-
Mature Ginger: For mature ginger, wait for the leaves to turn yellow and die back. This indicates that the plant has stored energy in the rhizomes, producing a more robust flavor.
-
Harvesting Method: Carefully dig up the entire root clump using a fork or your hands. You can take a portion of the root and replant the rest for continuous harvests.
Storing Fresh Ginger
If you have excess ginger after harvesting, proper storage is key:
-
Refrigeration: Freshly harvested ginger can be stored in the refrigerator for up to three weeks in a paper bag.
-
Freezing: Peel and chop the ginger into small pieces before freezing them in an airtight container. Frozen ginger can last for several months.
Troubleshooting Common Issues
Despite its resilience, ginger grown indoors can sometimes face challenges. Here are common issues and how to resolve them:
-
Yellowing Leaves: This can indicate overwatering or nutrient deficiency. Ensure proper watering and consider using fertilizer.
-
Wilting: May occur from underwatering. Check the moisture of your soil and adjust accordingly.
-
Pests: Watch for signs of pests like spider mites or aphids. Use insecticidal soap or neem oil to treat infestations.
Conclusion
Growing ginger indoors is a straightforward and rewarding endeavor. With just a few simple steps, you can enjoy fresh ginger year-round, enhancing your culinary experiences and reaping health benefits. This easy hack allows anyone, regardless of their gardening experience, to cultivate this aromatic spice and reap its rewards.
FAQs
1. Can I grow ginger in a regular garden instead of indoors?
Yes, ginger can be grown outdoors in warm climates. Ensure it is planted in well-draining soil with plenty of shade.
2. How often should I water my indoor ginger?
Water your indoor ginger when the top inch of soil feels dry. Ideally, the soil should be consistently moist but not soggy.
3. Is ginger difficult to grow indoors?
Not at all! With the right conditions, ginger is a relatively easy plant to grow indoors.
4. How long does it take for ginger to sprout?
Ginger typically takes 2-3 weeks to sprout after being planted.
5. Can I use store-bought ginger for planting?
Yes, as long as it is organic and has visible eyes. However, avoid using dried or sprouted ginger, as it may not grow well.
6. What should I do if my ginger plant doesn’t sprout?
Ensure that your ginger root was fresh and had eyes. Check the temperature and moisture levels, as these can affect growth.
Growing ginger indoors is both feasible and enjoyable. Whether you’re a seasoned gardener or a beginner, these straightforward steps will have you harvesting fresh ginger in no time. Enjoy the process, and happy gardening!