The drumstick tree, scientifically known as Moringa oleifera, is a versatile plant prized for its nutritional value and medicinal properties. Often referred to as the “miracle tree,” its growth potential and adaptability make it an appealing choice for gardeners and agricultural enthusiasts alike. However, to harness its full potential, understanding the art of cutting and propagating drumstick trees is essential. This guide will walk you through the techniques for successful cutting, rooting, and propagation of drumstick trees while addressing common questions in the FAQs section at the end.
Understanding the Drumstick Tree
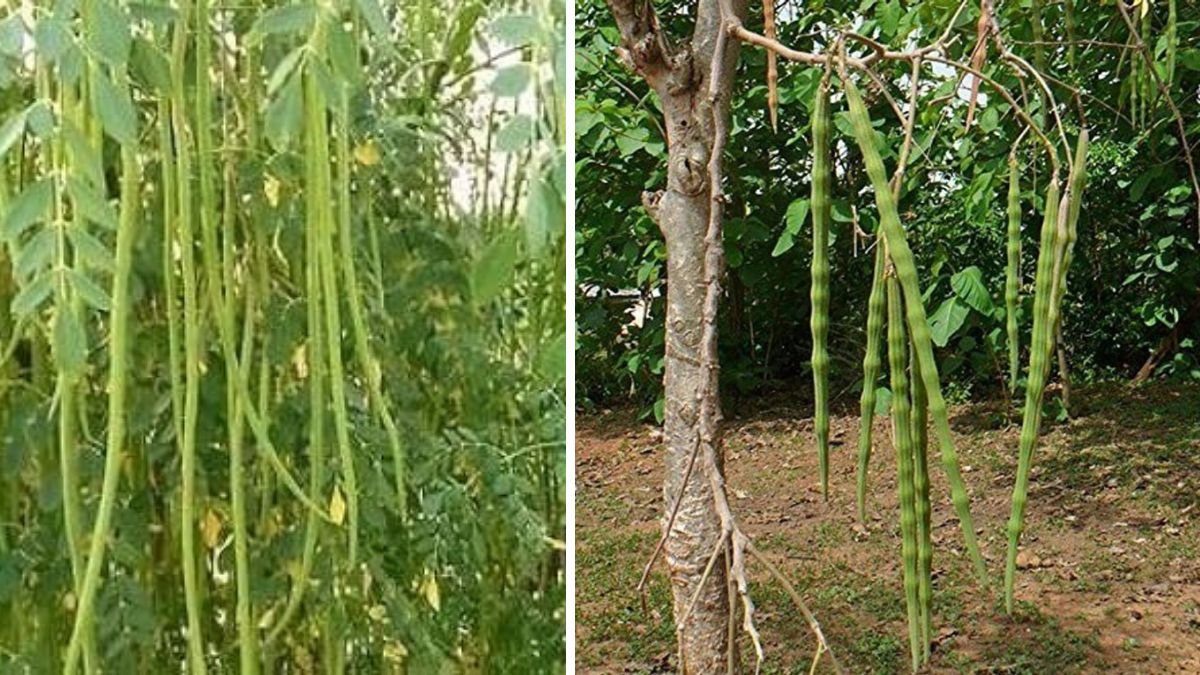
Before diving into propagation techniques, it is essential to have a basic understanding of the drumstick tree itself. Native to northern India, Moringa oleifera has become a widely cultivated tree in tropical and subtropical regions. The tree can grow up to 10-15 meters tall, featuring feathery green leaves and elongated, pod-like fruits known as drumsticks, which are often used in culinary practices.
Benefits of Drumstick Trees
Drumstick trees are celebrated for their:
- High Nutritional Value: The leaves, pods, and seeds are rich in vitamins A, C, and E, as well as minerals such as calcium and iron.
- Medicinal Properties: Traditionally, Moringa has been used to treat various ailments, including inflammation and digestive issues.
- Environmental Benefits: The tree is drought-tolerant and helps improve soil quality.
With these benefits in mind, mastering the art of cutting drumstick trees for propagation can significantly expand your garden or farming efforts.
Preparing for the Cuttings
Before you begin cutting, preparatory steps will ensure a higher success rate in rooting:
-
Choose the Right Time: The best time to take cuttings is during the rainy season or in early spring when growth is robust.
-
Select Healthy Parent Trees: Only choose cuttings from vigorous, disease-free trees. The health of the parent plant directly affects the success of the cuttings.
-
Gather Tools: You’ll need a sharp knife or pruning shear, clean pots for planting, potting mix or compost, and water.
Cutting Techniques for Drumstick Trees
To achieve optimal rooting success, follow these cutting techniques:
1. Choosing the Cutting Size
Length:
Cuttings should ideally be about 30-45 cm (12-18 inches) long, allowing for ample room for rooting. This length also helps balance water utilization during the initial growth phase.
Thickness:
Select cuttings that are about the thickness of a pencil or slightly larger. Thicker cuttings may have a better chance of developing roots, while thinner ones might need additional water to establish.
2. Stepping Through the Cutting Process
Step 1: Make the Cut
Using your sharp knife or shears, make a clean cut at a 45-degree angle. This angled cut increases the surface area, allowing for better water uptake and faster rooting.
Step 2: Remove Leaves
For the lower portion of the cutting, remove all leaves to reduce transpiration (loss of water). However, leave a few top leaves intact to aid photosynthesis.
Step 3: Allow to Callus
Place the cuttings in a shaded, dry area for 24 to 48 hours. This allows the cut surfaces to callus over, which reduces the risk of rot when planted.
3. Planting the Cuttings
Preparing the Soil
Use a well-draining potting mix or create a blend of garden soil, compost, and sand. Good drainage is imperative to prevent root rot.
Planting Depth
Once the cuttings have callused, plant them in pots, burying them about 10-15 cm (4-6 inches) deep in the soil. Make sure to plant them upright to ensure proper growth.
Watering
After planting, thoroughly water the cuttings, making sure the soil is moist but not waterlogged. Watering should continue regularly but be mindful of over-watering.
Caring for Your Cuttings
After planting, nurturing the cuttings will enhance their chances of rooting successfully. Here are some essential care guidelines:
Light Conditions
Place the pots in an area that receives indirect sunlight. Too much direct sunlight can scorch the cuttings, while too little can hinder growth.
Monitoring Moisture
Keep the soil consistently moist, especially during the first few weeks. A spray bottle can be helpful to provide even moisture without over-soaking the soil.
Fertilization
After about four weeks, when roots have possibly developed, introduce a diluted, balanced fertilizer to provide nutrients essential for growth.
Temperature
Moringa prefers warm climates, so it’s vital to keep cuttings in environments where temperatures are consistently above 20°C (68°F).
Transplanting Your Drumstick Trees
After successful rooting, it will be time to transplant the young moringa trees to larger pots or directly into the ground.
Timing of Transplanting
Waiting until the roots are well-established (usually after 2-3 months) is crucial to minimize shock to the plant.
Choosing a Location
When choosing a location, consider sunlight exposure and soil quality. Drumstick trees thrive in well-drained soil under full sun.
Transplanting Procedure
Dig a hole twice the size of the root ball, gently remove the young tree from its pot, and place it in the newly dug hole. Backfill with soil and water well.
Common Challenges to Anticipate
While propagating drumstick trees can be rewarding, you might encounter several challenges:
Root Rot
Over-watering is a common issue. Ensure proper drainage and monitor watering schedules closely.
Pests and Diseases
Look out for common pests like aphids and whiteflies. Natural pest control methods or neem oil can be effective.
Environmental Conditions
Moringa trees are sensitive to temperature. Ensure the environment remains sufficiently warm, particularly if starting indoors.
Frequently Asked Questions (FAQs)
Q1: How long do drumstick cuttings take to root?
A: Rooting can take anywhere from 2 to 8 weeks, depending on environmental conditions such as temperature and humidity.
Q2: Can I propagate drumstick trees from seeds?
A: Yes, you can propagate from seeds. Soak the seeds for a few hours before planting them in well-draining soil. They usually germinate within a week.
Q3: What is the best time of year to take cuttings?
A: The best time is during the rainy season or early spring when the tree is actively growing.
Q4: How do I know if my cuttings have rooted?
A: Gently tug on the cutting; resistance usually indicates root establishment. You can also check for new leaf growth.
Q5: Can I grow drumstick trees in pots?
A: Yes, drumstick trees can be grown successfully in pots, but ensure they have enough space for root growth as they mature.
Q6: What is the ideal spacing for drumstick trees when planting?
A: If planting in the ground, space the trees about 3-5 meters (10-16 feet) apart to allow for optimal growth.
Q7: Do drumstick trees require a lot of maintenance?
A: Drumstick trees are relatively low-maintenance once established, requiring occasional pruning and monitoring for pests.
Q8: Can I take cuttings from young trees?
A: It’s best to take cuttings from healthy trees that are at least 1-2 years old for the best rooting success.
Q9: How often should I fertilize my cuttings?
A: Once roots are established (around 4 weeks), use a diluted balanced fertilizer every 4-6 weeks to promote growth.
Q10: What pests should I be aware of when propagating drumstick trees?
A: Common pests include aphids, spider mites, and whiteflies. Regularly inspect your plants and use organic pesticides if necessary.
Conclusion
Mastering the art of drumstick tree cutting can significantly enhance your gardening or agricultural efforts. By understanding the techniques and principles involved in propagation, maintaining optimal growing conditions, and addressing potential challenges proactively, you can ensure the successful rooting and growth of your Moringa oleifera cuttings. Happy gardening!