The ZZ Plant (Zamioculcas zamiifolia), also known as the Zanzibar Gem, is celebrated for its attractive, glossy leaves and resilience in low-light conditions. Native to East Africa, the ZZ plant is a favorite among houseplant enthusiasts, and lucky for us, it can be easily propagated. This guide will walk you through the step-by-step process of propagating ZZ plants using leaf cuttings, ensuring you can multiply your green thumb with confidence.
Why Propagate ZZ Plants?
Before we dive into the propagation process, let’s explore why you might want to propagate ZZ plants:
- Cost-Effective: Propagating plants can save you money compared to purchasing new ones.
- Plant Collection: Adding more plants allows you to expand your collection or share them with friends and family.
- Resilience: ZZ plants are robust and can thrive even with minimal care, making them an excellent choice for new plant owners.
Materials You’ll Need
Before you begin, gather the following materials:
- Healthy ZZ Plant: A mature plant to take cuttings from.
- Sharp Knife or Scissors: For clean cuts.
- Potting Soil: Well-draining potting mix.
- Small Pots or Containers: For the cuttings.
- Rooting Hormone (Optional): To promote faster root growth.
- Water: For hydration.
- Plastic Bag or Domed Cloche: To create a humid environment.
Step-by-Step Propagation Process
Step 1: Choosing the Right Time
The best time to propagate ZZ plants is during the warmer months, typically spring or early summer. During this period, the plant is actively growing, increasing the chances of successful propagation.
Step 2: Preparing to Take Cuttings
-
Select Healthy Leaves: Look for healthy, mature leaves on your ZZ plant. Ensure they are free from pests and disease.
-
Sterilize Your Tools: To prevent infections, clean your knife or scissors with rubbing alcohol before making any cuts.
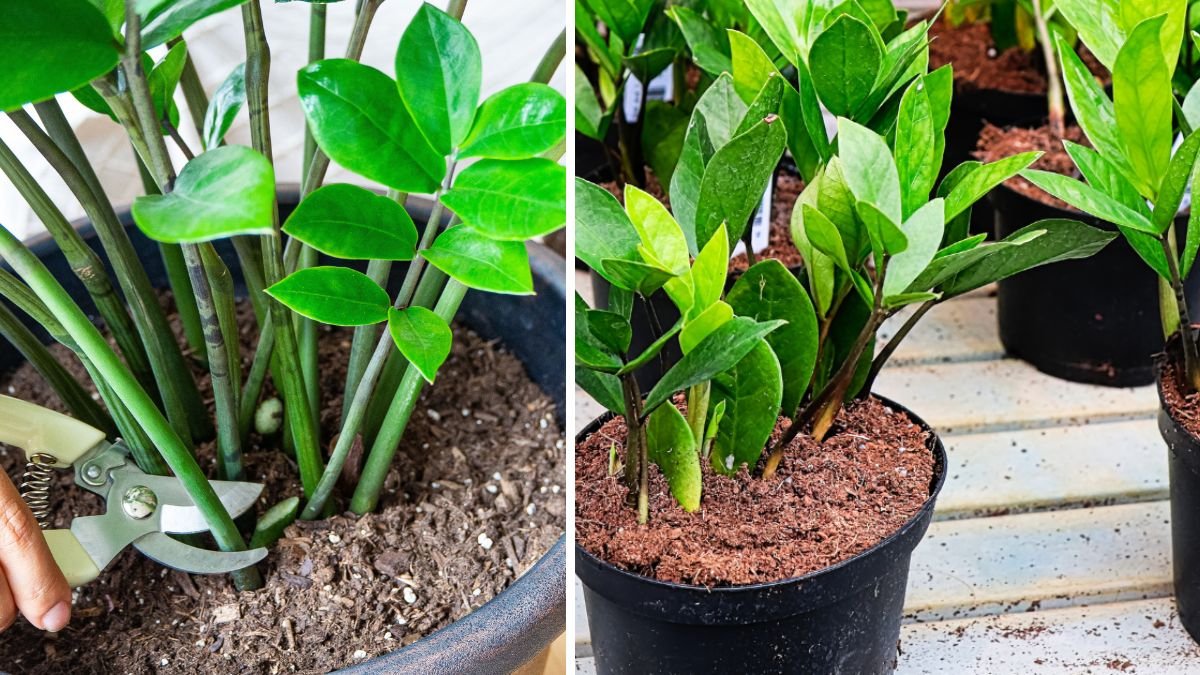
Step 3: Taking Leaf Cuttings
-
Make a Clean Cut: Identify a leaf and cut it from the stem close to its base. Aim for a cutting about 4 to 8 inches long.
-
Inspect the Leaf: Check for any damage or disease on the cut leaf. Discard any that appear unhealthy.
Step 4: Optional – Using Rooting Hormone
While it’s not necessary, applying rooting hormone to the cut end of the leaf can speed up the rooting process.
- Dip in Rooting Hormone: Lightly dip the cut end of the leaf into rooting hormone powder. Tap off any excess.
Step 5: Planting the Cuttings
-
Prepare the Pot: Fill a small pot or container with well-draining potting soil.
-
Plant the Cuttings: Insert the cut end of the leaf into the soil, burying it about 1-2 inches deep.
-
Watering: Lightly water the soil to settle it around the cutting. Ensure the soil is moist but not soggy.
Step 6: Creating a Humid Environment
-
Cover the Pots: For better humidity, you can cover the pots with a plastic bag or a domed cloche. Ensure the cover doesn’t touch the leaves.
-
Ventilation: If you’re using a plastic bag, remember to open it periodically to allow fresh air in.
Step 7: Placing the Cuttings
-
Lighting: Place the pots in an area with bright, indirect sunlight. Avoid direct sunlight, as it might scorch the leaves.
-
Temperature: Ensure the room temperature remains between 70°F to 80°F (21°C to 27°C) for optimal growth.
Step 8: Caring for the Cuttings
-
Monitor Moisture: Keep the soil evenly moist but not soaking wet. Over-watering can lead to rot.
-
Watch for Growth: In a few weeks, you should start to see new growth or roots emerging.
Step 9: Transplanting
After a couple of months, when your cuttings have developed roots and new leaf growth, they can be transplanted into larger pots.
-
Gently Remove: Carefully take the rooted cutting out of the pot. Be gentle to avoid damaging the new roots.
-
New Pot: Place it in a larger pot with fresh potting soil.
-
Water and Care: Water well and continue to care for the newly potted plant like an adult ZZ plant.
Frequently Asked Questions (FAQs)
1. How long does it take for ZZ plant cuttings to root?
It generally takes 4 to 8 weeks for ZZ plant cuttings to root, depending on the environmental conditions and care provided.
2. Can I propagate ZZ plants in water?
While it’s possible to propagate ZZ plants in water, it’s less common. ZZ plants prefer a well-draining soil medium for optimal growth. If you choose to try water propagation, ensure you eventually transfer the plant back to soil once roots develop.
3. What should I do if my cuttings are wilting?
If your cuttings are wilting, check for over-watering, which can lead to root rot. Adjust your watering routine accordingly, ensuring the soil remains moist but not soggy.
4. How often should I water my newly propagated ZZ plants?
After propagation, water your ZZ plants when the top inch of soil feels dry. This typically means watering every 1-2 weeks, but it may vary based on humidity and temperature conditions in your home.
5. What conditions do ZZ plants thrive in?
ZZ plants thrive in bright, indirect light but are tolerant of low-light conditions. They prefer temperatures between 70°F to 80°F (21°C to 27°C) and should be kept away from cold drafts.
6. Can ZZ plants survive in low light?
Yes, ZZ plants are known for their ability to tolerate low light, making them an excellent choice for dimly lit areas. However, they will grow faster and healthier in brighter lighting.
7. When should I stop covering my cuttings?
Once you start to see new growth (usually within 4 to 6 weeks), you can begin to remove the cover gradually to acclimate the new plant to regular humidity levels.
Conclusion
Propagating ZZ plants using leaf cuttings is an easy and rewarding endeavor. With proper care, your cuttings will thrive and provide you with ample plants to decorate your space or share with others. By following this step-by-step guide, you can enjoy the satisfaction that comes from nurturing plants from their very beginnings. Happy propagating!