Growing sweet potato tubers at home is a rewarding endeavor that brings nutritious and delicious results. Not only are sweet potatoes versatile in cooking, but they are also rich in vitamins and minerals. This guide is designed for beginners, making the process of growing your own sweet potatoes simple and enjoyable.
What are Sweet Potatoes?
Sweet potatoes (Ipomoea batatas) belong to the morning glory family and are not related to regular potatoes. They are known for their sweet taste, striking orange color, and high nutritional value. They can be baked, mashed, fried, or even turned into fries. Sweet potatoes are rich in beta-carotene, fiber, and important vitamins like Vitamin C and B6.
Why Grow Sweet Potatoes at Home?
-
Nutritional Benefits: Growing your own sweet potatoes ensures you have access to fresh, organic produce.
-
Cost-Effective: Buying sweet potatoes can be expensive, especially organic varieties. Growing them at home can save you money.
-
Space Efficient: Sweet potatoes can be grown in small spaces, including containers, making them perfect for small gardens or patios.
-
Fragrance and Beauty: Sweet potato plants produce beautiful vines and flowers, adding aesthetic appeal to your garden.
Getting Started
Choosing the Right Variety
There are many varieties of sweet potatoes, each with unique flavors and colors. Some popular varieties include:
- Beauregard: Orange-fleshed, sweet, and disease-resistant.
- Covington: Another orange variety, known for its smooth skin and sweet flavor.
- Japanese Sweet Potato: Purple-skinned with creamy, yellow flesh.
Choose a variety based on your taste preference and the climate in your region.
Preparing the Soil
Sweet potatoes thrive in well-drained, sandy loam soil with a pH between 5.8 and 6.2. Here are some steps to prepare the soil:
-
Choose a Location: Look for a sunny spot that gets at least 6 to 8 hours of sunlight daily.
-
Soil Testing: Test the soil using a home kit to determine pH levels and nutrient content.
-
Amend the Soil: If needed, amend the soil with compost or well-rotted manure to improve fertility.
-
Create Raised Beds: If your ground soil is heavy clay, consider creating raised beds to improve drainage.
Propagating Sweet Potatoes
You can grow sweet potatoes from either seed potatoes or slips. Slips are sprouts that grow from seed potatoes.
Growing Slips from Seed Potatoes
-
Choose Healthy Potatoes: Select organic sweet potatoes that are free from blemishes and disease.
-
Cut the Potatoes: Cut the sweet potatoes in half (if large) or leave them whole and place them in a jar of water, half submerged.
-
Sprouting: Place the container in a warm, sunny area. Roots will develop from the bottom, while leaf sprouts will grow from the top.
-
Timing: Allow the slips to grow until they are about 6 inches long, which usually takes 4 to 6 weeks.
-
Harvesting Slips: Once the slips have roots, twist them off the potato and place them in soil or jars of water until ready to transplant.
How to Plant Sweet Potatoes
Once your slips are ready, it’s time to plant them:
-
Timing: Plant sweet potato slips after the last frost date when the soil has warmed to at least 70°F (21°C).
-
Planting Depth: Plant the slips in the soil, burying them up to the top leaves, which encourages additional root growth.
-
Spacing: Space your slips about 12 to 18 inches apart to allow room for their sprawling vines.
-
Watering: Water gently after planting, ensuring the soil is moist but not soggy.
Caring for Sweet Potato Plants
Watering
Sweet potatoes require consistent moisture, especially in the first few weeks after planting. Water them once a week in dry periods, allowing the soil to dry slightly between waterings. However, be careful not to overwater, as sweet potatoes are susceptible to rot.
Fertilization
-
Initial Feeding: After about 4 to 6 weeks, you can apply a balanced fertilizer or organic compost around the base of the plants.
-
Mid-Season Feeding: During mid-season, consider using a fertilizer higher in potassium for better tuber development.
Weeding and Mulching
-
Weeding: Regularly check for weeds, as they compete with your sweet potatoes for nutrients and water. Hand-pulling is effective when the plants are young.
-
Mulching: Apply a layer of mulch around your plants to retain soil moisture, suppress weeds, and regulate soil temperature.
Pest and Disease Management
Watch for common pests such as:
- Sweet Potato Weevil: Look for holes in tubers. Remove infested plants and practice crop rotation.
- Flea Beetles: Thin, black beetles that can be controlled by using row covers or insecticidal soap.
Common diseases include:
- Powdery Mildew: Control by ensuring good air circulation and avoiding overhead watering.
- Root Rot: Ensure good drainage and avoid overwatering.
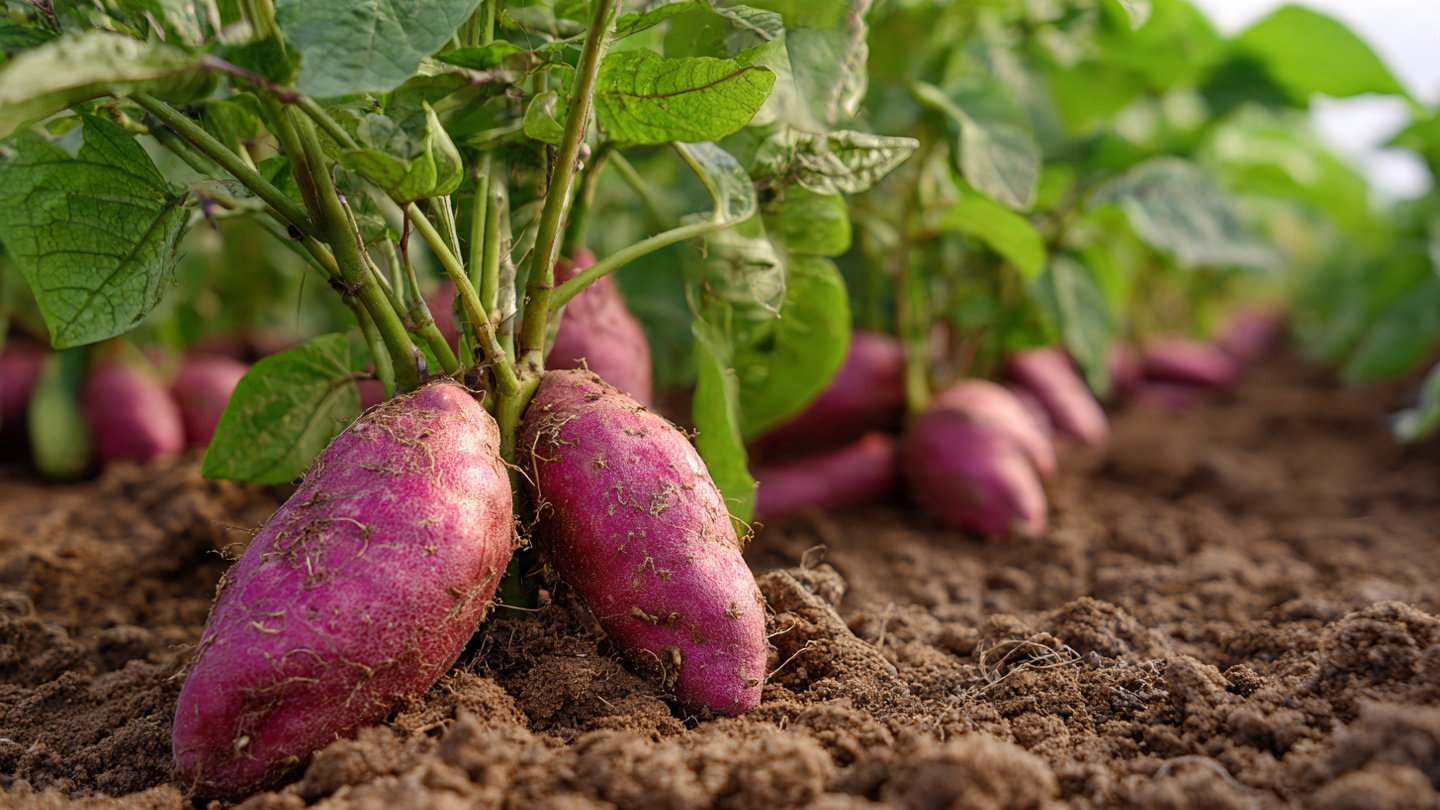
Harvesting Sweet Potatoes
Timing
Sweet potatoes generally take about 90 to 120 days to mature, depending on the variety. The leaves will begin to yellow, and the vines will die back when they are ready to harvest.
Harvesting Process
-
Tools Needed: Use a spading fork or shovel for careful digging to avoid damaging the tubers.
-
Careful Digging: Start digging at the base of the plant, gently lifting the tubers from the ground. Be careful not to puncture them.
-
Cleaning: Shake off excess dirt and avoid washing them until you’re ready to use them, as moisture can lead to rot during storage.
Storing Sweet Potatoes
-
Curing: After harvesting, cure sweet potatoes by placing them in a warm, humid place (about 85°F or 29°C) for 10–14 days. This enhances their sweetness and extends storage life.
-
Storage Conditions: Once cured, store sweet potatoes in a cool, dark, and dry place at temperatures between 55°F and 60°F (13°C-16°C).
-
Check Regularly: Inspect stored sweet potatoes regularly for signs of rot or spoilage.
Cooking Sweet Potatoes
Sweet potatoes are incredibly versatile in the kitchen. Here are some popular ways to prepare them:
- Baking: Simply roast or bake whole sweet potatoes for a nutritious snack.
- Mashed: Boil and mash with butter, sugar, and spices.
- Fried: Cut into fries or chips and fry or bake until crispy.
- Casseroles: Use sweet potatoes in savory or sweet casseroles topped with marshmallows or pecans.
FAQs
1. Can I grow sweet potatoes in containers?
Yes! Sweet potatoes can be grown in large containers or tubs with good drainage. Ensure the container is at least 5 gallons in size and follow the same care guidelines.
2. How can I tell when sweet potatoes are ready to be harvested?
Sweet potatoes are ready when the leaves begin to yellow and die back. Depending on the variety, this usually occurs 90 to 120 days after planting.
3. Why are my sweet potato leaves turning yellow?
Yellowing leaves can be a sign of stress, often due to overwatering, nutrient deficiency, or pest damage. Check soil moisture and look for insects to diagnose the issue.
4. Can I eat the leaves of sweet potatoes?
Yes, sweet potato leaves are edible and nutritious! They can be used in salads or cooked like spinach.
5. How do I prevent pests?
Regular inspection of your plants is vital. Use organic pest control methods such as neem oil or insecticidal soap, and practice crop rotation to minimize pest issues.
6. Is it necessary to cure sweet potatoes after harvest?
Yes, curing enhances the flavor and sweetness of sweet potatoes and helps them store better. Curing is especially important for long-term storage.
7. Can I propagate sweet potatoes from store-bought tubers?
Yes, as long as they are organic and haven’t been treated with growth inhibitors. Choose healthy tubers to grow slips.
Conclusion
Growing sweet potatoes at home is a fulfilling and enriching experience. With the right preparation, care, and patience, you can enjoy a bountiful harvest of this nutritious and versatile vegetable. Embrace the process, and soon you’ll be excited to cook and savor the fruits of your labor!